Mazda3 Forums banner

How do you replace the serpentine belt?

1 reading
65K views 16 replies 8 participants last post by  Lex2007  
#1 ·
I have not seen a DIY for this...the dealer says mine needs replacing on my 07 speed3.

They want 300 bucks to do it! I told them they were on crack.

I am sure I could do this myself, since I have done all the mods to the car, including the down pipe, the rear motor mount, the CAI and the brake lines. How could this be more technical or intense?
 
#3 ·
It's pretty damn simple on the speed, you stick a wrench on the belt tensioner, push it towards the rear of the car, take the belt off, and put a new one on.

Normal 3's are a bit more complex since there are 2 belts involved, pretty much the same idea though.
 
#5 ·
Oh that is cool!
How does one get their hands on a shop manual?
 
#6 ·
I downloaded one free online - just google free mazda shop manual. There are a bunch of sites out there like pdfqueen. Its huge - like 3,000 pages and 150Meg. The one I got is for 2007, but most of the stuff is good for 2004-2009 (which is what I need), and the 2007 has the Speed stuff.
 
#8 ·
Search is my friend...I just wish I could make it sit up and beg. I guess I should have just looked for the manual first.
 
#9 ·
Thanks, everyone! I will buy the belt and replace the damn thing myself. Looks like a really easy job.
 
#11 ·
[quote author=dugger_8 link=topic=181134.msg3834589#msg3834589 date=1287666859]
$300 for a five minute job, wtf!

As mentioned earlier, for the NA 3, you'll have to remove the AC belt first. It's also a bitch to get back on (AC belt that is).
[/quote]

Actually, there's a trick to that. Unbolt the AC compressor from the motor, don't loosen the lines though. You can easily replace the belt then. Just the 4 nuts holding the shield on, and then the 4 bolts holding the compressor to the motor.
 
#12 ·
[quote author=smokinAMD link=topic=181134.msg3834700#msg3834700 date=1287672249]
[quote author=dugger_8 link=topic=181134.msg3834589#msg3834589 date=1287666859]
$300 for a five minute job, wtf!

As mentioned earlier, for the NA 3, you'll have to remove the AC belt first. It's also a bitch to get back on (AC belt that is).
[/quote]

Actually, there's a trick to that. Unbolt the AC compressor from the motor, don't loosen the lines though. You can easily replace the belt then. Just the 4 nuts holding the shield on, and then the 4 bolts holding the compressor to the motor.
[/quote]

I did that but couldn't get it to go back on. It was also late and cold and I was sick so that may have played a hand in it.
 
#13 ·
Here is the data on the belt:

For the 2007 MazdaSpeed3

From Dayco belts


Part number 5060910

Multiple Accessory

Advance Auto parts has it for 26 bucks
 
#14 ·
I just did this job in less than 2 hours (it was my first time). I replaced both the AC Belt and the Serpentine Belt.

First I'd like to note I did NOT need to use a tool or a jig and I did NOT need to loosen or remove the AC Compressor.

This is how I did it from start to finish:
1. Drove vehicle up on front ramps
2. Opened the hood and disconnected the negative (-) terminal
3. Removed vehicle underskirt
4. Removed the cover attached to the AC compressor
5. Cut the AC belt with a pair of bolt cutters (I didn’t know if it would pop and snap me in the face so I picked something that I knew would cut it and that would have long arms to give me distance)
6. Released tension with socket wrench on the tension pully
7. Removed Serpentine belt
8. Install new Serpentine belt
*Now the fun part*
9. Put on the AC belt around the pulley attached to the AC compressor ONLY. I put it completely around the AC pulley as much as I could and the same for the pulley attached to the other end as much as possible on the RIGHT side
10. I put my finger along the RIGHT side on the belt as I turned the pulley with my long tool that I use to loosen the lug nuts on my tires
11. Eventually the belt slipped on
12. Verified the belt was in the proper grooves for both the AC belt and the Serpentine belt
13. Put everything back together (cover over the AC compressor, vehicle underskirt, negative battery terminal, and battery cover)

I did run into a snag, because I was kind of doing it as I went along while making sure not to damage either belt (primarily the AC belt). I had not been watching the belt turn on the AC compressor and it slipped up and went a tad on the side of the pulley after it was slipped into place on the end with the Serpentine belt. To fix this I just went in reverse with the old belt I cut going between the new AC belt and the pulley and it just slipped into place (making a half-full rotation to get the cut belt from under the new belt that's going around the pulley to prevent it from digging into the new belt)

I hope this helps, sorry I didn’t take any pictures but if anyone would like I can try to later if absoloutely necessary. I found out after getting down there that neither belt really needed to be changed; the only reason I did it was because I started hearing the slipping noise every now and then when accelerating. My vehicle has ~53,000miles on it and it’s a 2006 Mazda 3 S 2.3L
 
  • Like
Reactions: mazzzdas
#15 ·
[quote author=incarceration link=topic=181134.msg3908719#msg3908719 date=1295185767]
I just did this job in less than 2 hours (it was my first time). I replaced both the AC Belt and the Serpentine Belt.

First I'd like to note I did NOT need to use a tool or a jig and I did NOT need to loosen or remove the AC Compressor.

This is how I did it from start to finish:
1. Drove vehicle up on front ramps
2. Opened the hood and disconnected the negative (-) terminal
3. Removed vehicle underskirt
4. Removed the cover attached to the AC compressor
5. Cut the AC belt with a pair of bolt cutters (I didn’t know if it would pop and snap me in the face so I picked something that I knew would cut it and that would have long arms to give me distance)
6. Released tension with socket wrench on the tension pully
7. Removed Serpentine belt
8. Install new Serpentine belt
*Now the fun part*
9. Put on the AC belt around the pulley attached to the AC compressor ONLY. I put it completely around the AC pulley as much as I could and the same for the pulley attached to the other end as much as possible on the RIGHT side
10. I put my finger along the RIGHT side on the belt as I turned the pulley with my long tool that I use to loosen the lug nuts on my tires
11. Eventually the belt slipped on
12. Verified the belt was in the proper grooves for both the AC belt and the Serpentine belt
13. Put everything back together (cover over the AC compressor, vehicle underskirt, negative battery terminal, and battery cover)

I did run into a snag, because I was kind of doing it as I went along while making sure not to damage either belt (primarily the AC belt). I had not been watching the belt turn on the AC compressor and it slipped up and went a tad on the side of the pulley after it was slipped into place on the end with the Serpentine belt. To fix this I just went in reverse with the old belt I cut going between the new AC belt and the pulley and it just slipped into place (making a half-full rotation to get the cut belt from under the new belt that's going around the pulley to prevent it from digging into the new belt)

I hope this helps, sorry I didn’t take any pictures but if anyone would like I can try to later if absoloutely necessary. I found out after getting down there that neither belt really needed to be changed; the only reason I did it was because I started hearing the slipping noise every now and then when accelerating. My vehicle has ~53,000miles on it and it’s a 2006 Mazda 3 S 2.3L
[/quote]


i got something easier go to the link finish your belt install in under 30minutes

http://www.mazda3club.com/showthread.php?p=417365&posted=1#post417365
 
#17 · (Edited)
Pictures of serpentine belt replacement

THIS IS FOR THE GENERATION 1 SPEED3.

Initially, I didnt understand how this self adjusting tensioner worked, so I figured I would help you guys out with some pics after my R&R of the serpentine belt.

NO NEED TO PAY SOMEONE TO DO THIS JOB! Its relatively easy.

You dont need but a few basic tools. You only need to jack up the front passenger side corner of the car and take off the wheel, unscrew (1 plastic screw) and two 10mm bolts and push the mud flap out of the way. EASY.

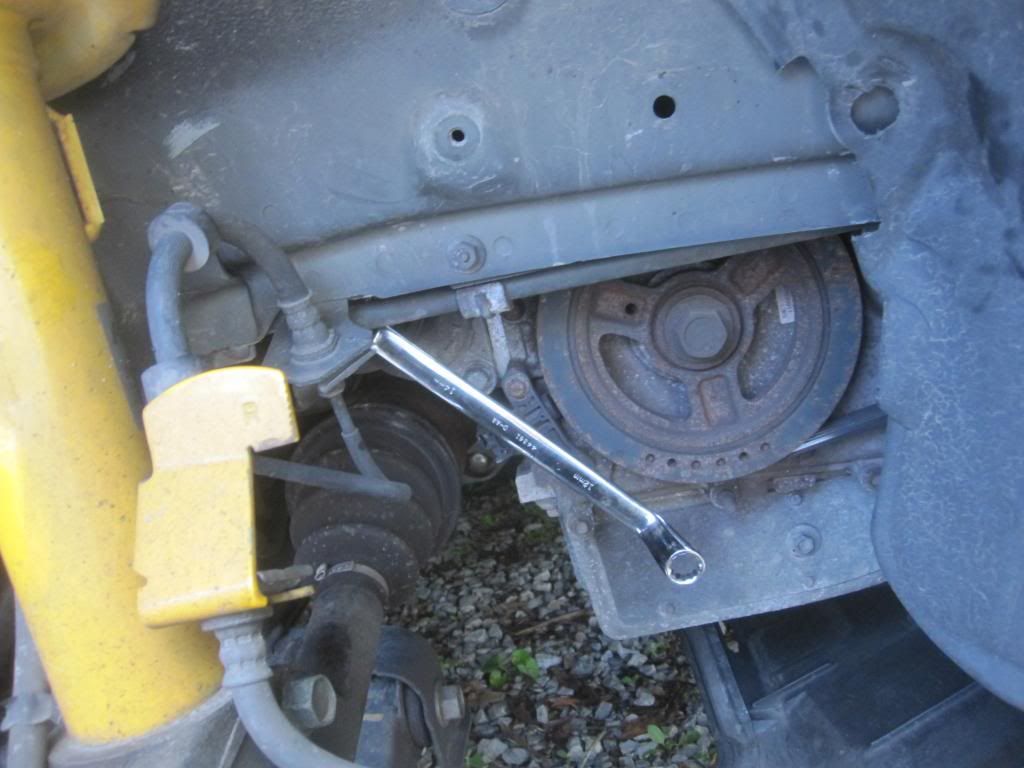
Then put a 14mm wrench on the center bolt of the tensioner pully and push the wrench clockwise, which causes the pulley to pivot upwards and move away from the belt.

Use an offset box wrench if you have one. 14mm.

See picture below:
Image


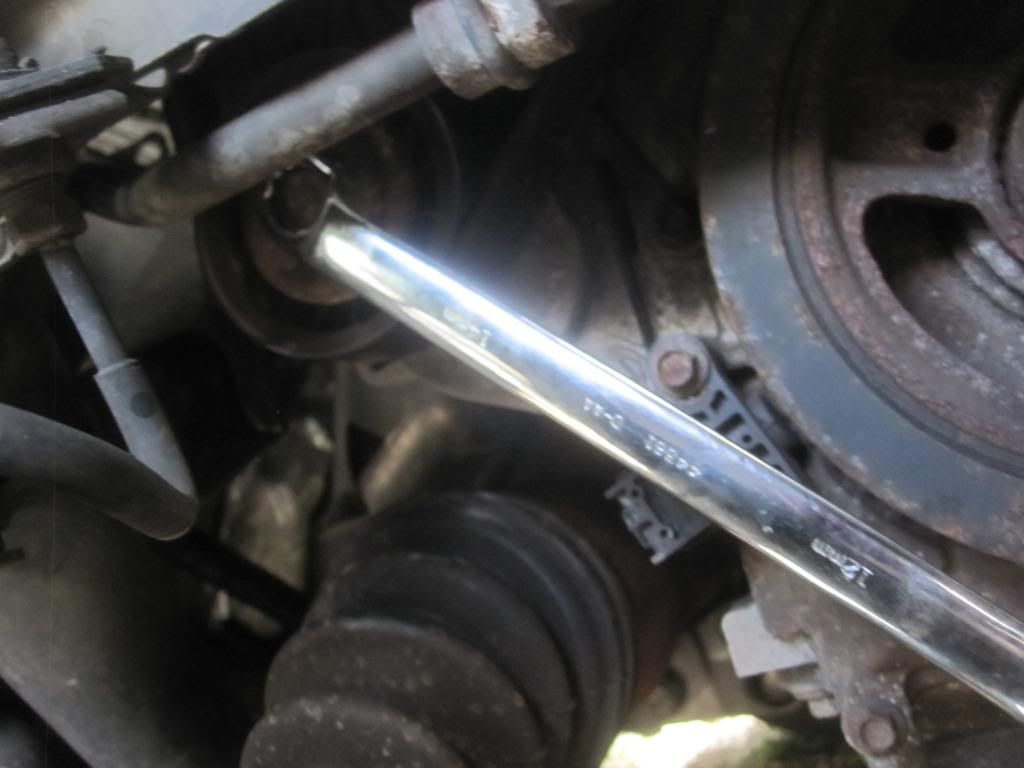
Here is another view.

Image


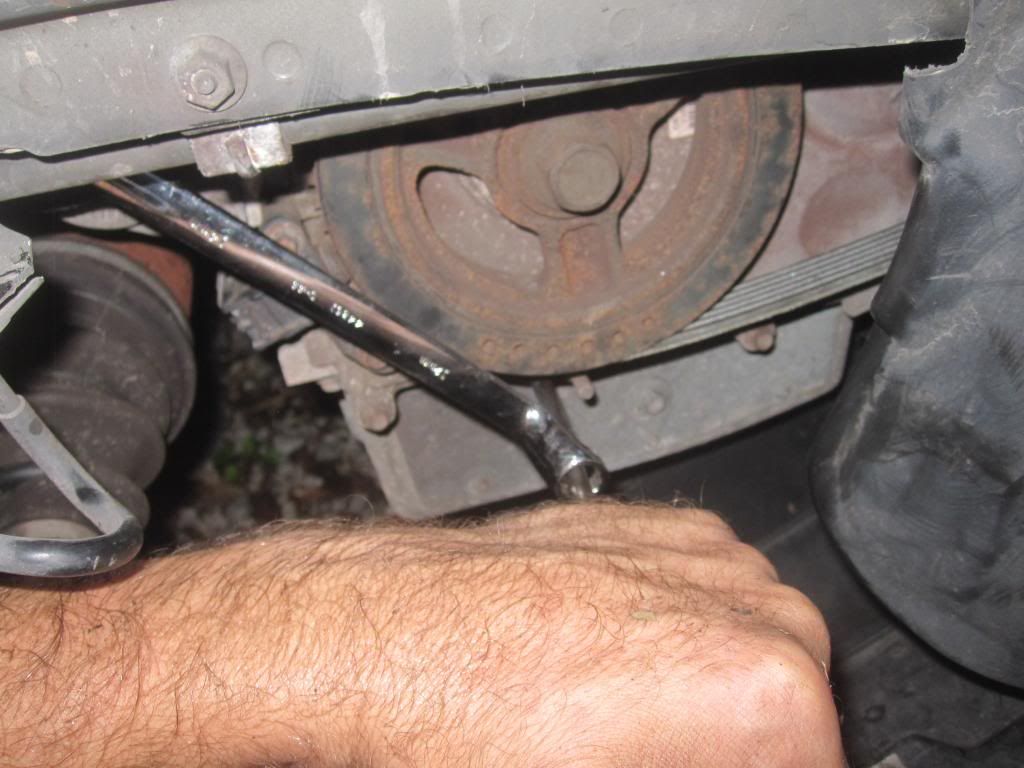
Once the pulley is away from belt, just pull the belt towards you, release the tensioner pulley and pull the belt out from the top after you unlooop it from the various other pulleys.

The tougher part is feeding the new belt in to follow the correct path. Start from the top and remember that you will feed the belt onto the tensioner pulley LAST as this is where you have the ability to make a little bit of space by moving that pulley with the wrench.

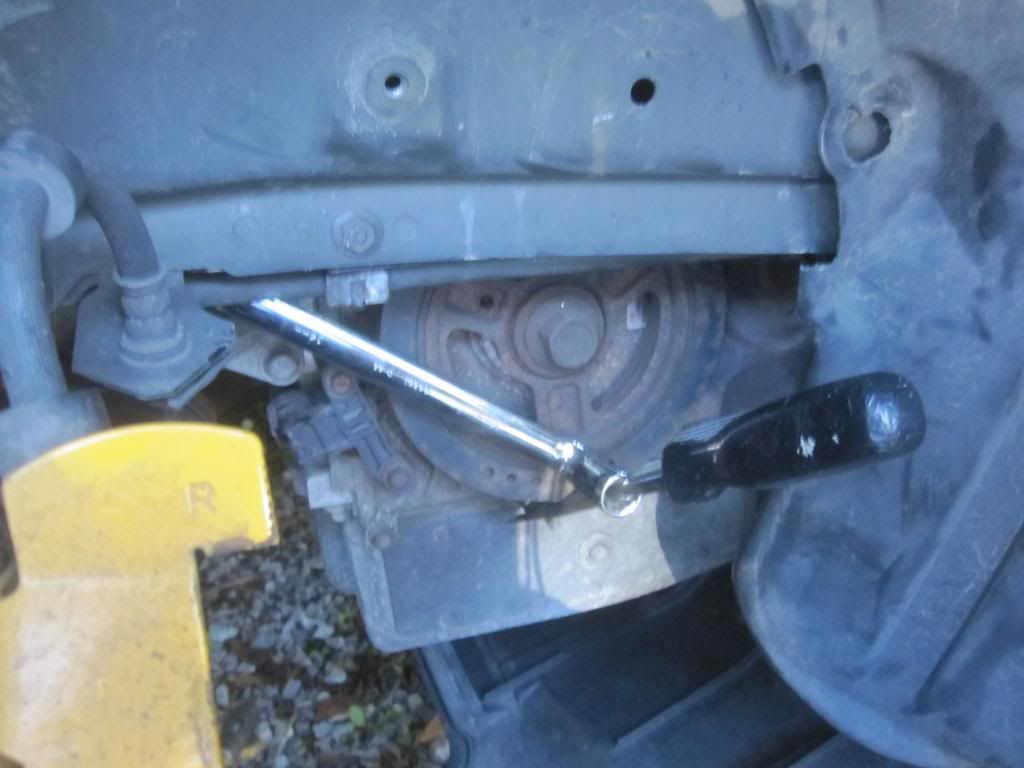
If you're alone like I was, use a screw driver, for example, as per the picture below to help hold the tensioner pulley as you sort of jimmy the new belt onto the tensioner pulley with ANOTHER phillips head screw driver. It will fit but it will take some prying to get it on there. You might even use a little lithium grease on the shaft of the second screwdriver to help it slide down the screwdriver and onto the tensioner pulley. Be careful not to cut into the new belt.

Image


In the picture below I hold the tensioner pulley out of the way with my LEFT hand on the screw driver (which I am using for additional leverage, as the tensioner pulley is under a lot of tension) while I use my right hand to jimmy the belt onto the tensioner pulley with another screw driver. I am pushing down or clockwise on the wrench in this picture. The black screwdriver just helps me keep the wrench in the down position.

Image


I dont have any pics of my right hand...sorry...ran out of arms.

MAKE SURE THE BELT IS FULLY WITHIN EACH PULLEY or you will destroy the belt upon starting the car.

Its not a hard job. YOU CAN DO IT.

While your down there check out your CV joint boots to make sure they aren't torn and look at the CV joint where it enters the transaxle to make sure you don't have a leaking seal.

Then you put the mud flap back on and you're done. I started my the car with the wheel off the ground to make sure the belt wasn't squealing. This caused the ABS and traction control lights to trigger, but they cleared after I put the wheel on and drove the car a minute.