

Please refer to this thread and this thread for more info/cautions on removing the emblem itself. This how-to is for how to paint the chrome flying M without removing it, by taping off the area and using spray paint in the car. CAUTION: Use spray paint and clear coat products in well ventilated areas ONLY. Keep your windows or doors open and follow all the instructions and precautions on the cans! Also, beware that spray painting in your car can cause PERMANENT damage--cosmetic and/or mechanical--if not done correctly.
As far as I know, this is the first official how-to on painting this specific emblem. Most of these steps I was doing by the seat of my pants and didn't have any example to go by, so I did make a few mistakes. So this is kind of a how-to as well as a DO and DON'T list") . I'll try to keep it relatively simple, and hopefully I'm not overloading you guys with steps/pics here. Sorry!
. I'll try to keep it relatively simple, and hopefully I'm not overloading you guys with steps/pics here. Sorry!
FYI, I did this mod because the glare from the chrome bothered me.
Total cost: $10-20
Difficulty (1-10): 2? (easy but tedious)
Time to complete: 30-40 minutes of actual work, total of 24-30 hours from prep to dry.
Supplies Needed:
1. Krylon Fusion (or similar) spray paint. (~$3 at Walmart)
2. Krylon Triple Thick Crystal Clear Glaze (or similar) clear coat. (~$3 at Walmart)
3. Masking/painters tape. (~$3-5 at Walmart? I used some I already had)
4. Razor blade
5. Several Q-tips
Optional: High grit sand paper ($2-3 at Walmart) and rubbing alcohol.
Steps In Order:
1. (optional) Using the high grit sand paper, carefully sand down the chrome until you get to the flat white plastic underneath. The nooks can be hard to get into, so it doesn't have to be perfect.
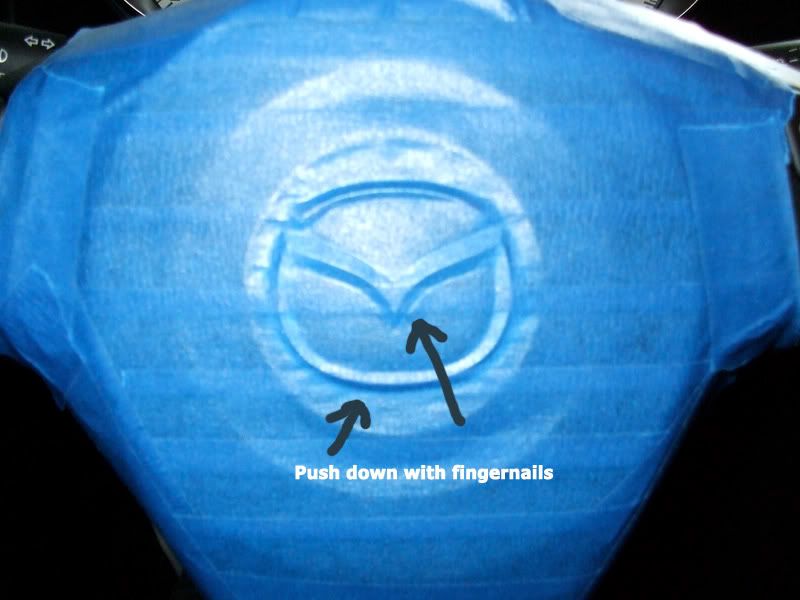
2. Using your masking tape, tape off the entire center area of the steering wheel, including over the entire emblem. Once taped, use your fingernails (or something similar) to press the tape down around the edges of the emblem itself until the outline of it is clear.
3. Using your razor blade, carefully cut the masking tape around the edges of the emblem, preferably in sections. This will enable you to peel the tape off the emblem, leaving it exposed for painting.
4. (optional) Using a Q-tip and some rubbing alcohol, clean off the sanded emblem to make there's no dirt, dust, or finger prints before you paint. Make sure it's completely dry before proceeding.
5. With your can of spray paint and Q-tips at hand, take several large sheets of newspaper and cover the areas all around the steering wheel, column, driver-side door, middle console, and driver seat/yourself. Make sure you use tape to seal the newspaper around the steering wheel itself to prevent over spray from getting through!
6. Following the directions on the can of spray paint, spray the emblem with an even coat approximately 10-16 inches away from the surface. Don't over coat it in one spray! Do quick but even coats, up to 2-3 times for the first round.
7. Using your Q-tips, very carefully touch up the paint immediately after the paint has stopped dripping. This takes a delicate touch, but soak up/spread the paint that accumulates along the top ridges of the emblem--particularly at the bottom. Be careful not to smudge the paint itself though, just very lightly smooth out the drips.
8. After one hour, re-coat the emblem with 1-2 more sprays, using the same Q-tip touch-up procedure immediately afterwards.
9. After 1-2 more hours, following the directions on the can of glaze, spray the emblem with an even layer of the clear coat. Only 1-2 coats are necessary. If you do a second coat, spray immediately after the first coat. And again use the Q-tip touch up as necessary--but VERY carefully. The glaze is a bit sticky and easy to smudge.
10. Allow everything to dry for 24 hours, carefully remove the tape, touch up as necessary with a razor, and voila! You're done. Per the instructions for the paint and clear coat, however, do not touch or handle the emblem for another 7 days following!
Pictures.....
![Image]()
^^ I didn't end up using the low grit sandpaper (on top), only the high grit 80 (green).
![Image]()
![Image]()
^^ I sanded after I taped, resulting in me having to re-do the tape all around the emblem.
![Image]()
^^ I didn't seal the newspaper, which I learned later was a mistake (over spray).
![Image]()
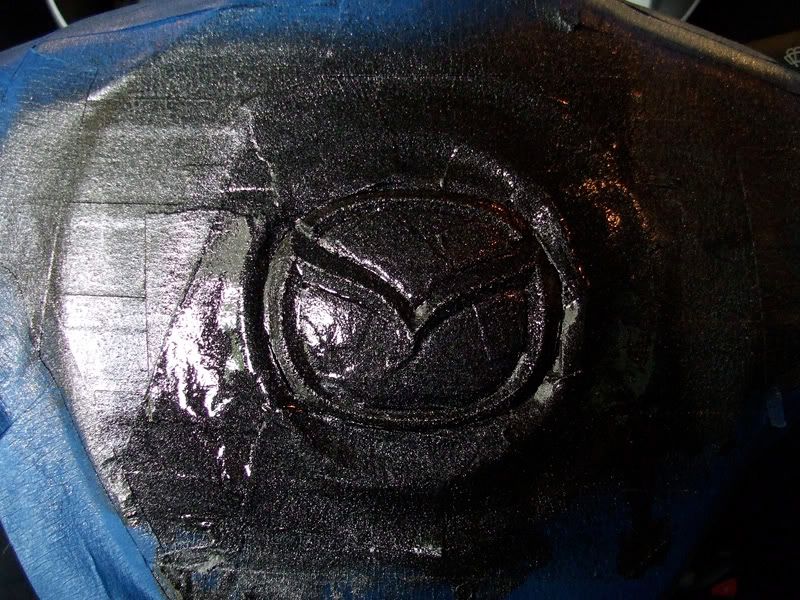
^^ During the painting process, I believe this was taken after my first round of coats.
![Image]()
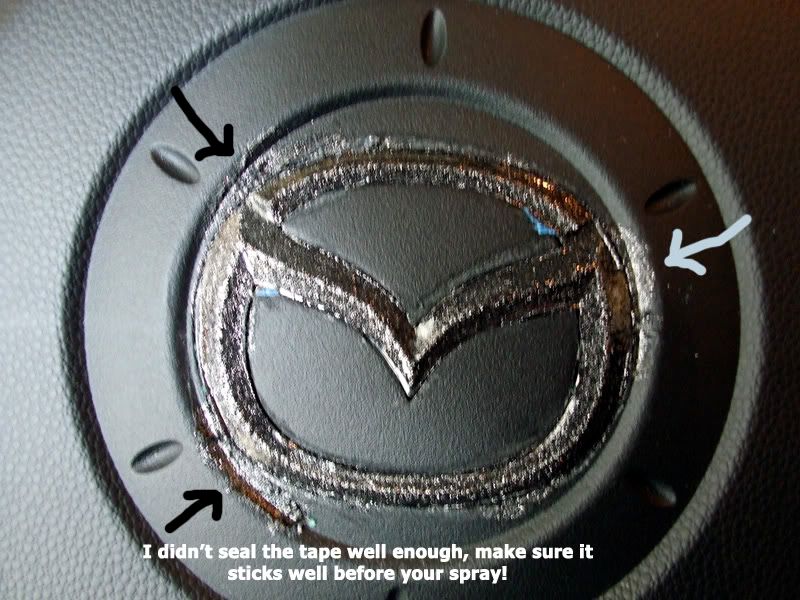
^^ After all paint and glaze coats were finished, this is the dried product 24 hours later.
![Image]()
![Image]()
^^ Taken after I scraped off some of the excess around the emblem using a razor and my fingernail, being careful not to touch the emblem itself too much.
![Image]()
^^ It's still a little rough around the edges, but a little better . And you can see my over spray.
Overall, I'm happy with it. Total cost: About $10-20. It's not perfect, and if I had a chance to do it again I'm sure I could do it a lot cleaner. But it's also not a disaster, and I can definitely live with it. Beats the chrome for sure! As far as the over spray goes, thanks to my methods of taping everything off around the center portion, it only got on the steering wheel cover--which is replaceable if it ever bugs me too much.
The biggest points I can't stress enough are to make sure the tape is well sealed and stuck around the emblem, and tape off the newspaper around the steering wheel before painting. And be very careful with your Q-tips! I ended up having to do 1-2 more coats than I wanted to because I smudged the paint during my touching up.
Hope somebody can use this and hopefully improve on my work.
As far as I know, this is the first official how-to on painting this specific emblem. Most of these steps I was doing by the seat of my pants and didn't have any example to go by, so I did make a few mistakes. So this is kind of a how-to as well as a DO and DON'T list
. I'll try to keep it relatively simple, and hopefully I'm not overloading you guys with steps/pics here. Sorry!FYI, I did this mod because the glare from the chrome bothered me.
Total cost: $10-20
Difficulty (1-10): 2? (easy but tedious)
Time to complete: 30-40 minutes of actual work, total of 24-30 hours from prep to dry.
Supplies Needed:
1. Krylon Fusion (or similar) spray paint. (~$3 at Walmart)
2. Krylon Triple Thick Crystal Clear Glaze (or similar) clear coat. (~$3 at Walmart)
3. Masking/painters tape. (~$3-5 at Walmart? I used some I already had)
4. Razor blade
5. Several Q-tips
Optional: High grit sand paper ($2-3 at Walmart) and rubbing alcohol.
Steps In Order:
1. (optional) Using the high grit sand paper, carefully sand down the chrome until you get to the flat white plastic underneath. The nooks can be hard to get into, so it doesn't have to be perfect.
2. Using your masking tape, tape off the entire center area of the steering wheel, including over the entire emblem. Once taped, use your fingernails (or something similar) to press the tape down around the edges of the emblem itself until the outline of it is clear.
3. Using your razor blade, carefully cut the masking tape around the edges of the emblem, preferably in sections. This will enable you to peel the tape off the emblem, leaving it exposed for painting.
4. (optional) Using a Q-tip and some rubbing alcohol, clean off the sanded emblem to make there's no dirt, dust, or finger prints before you paint. Make sure it's completely dry before proceeding.
5. With your can of spray paint and Q-tips at hand, take several large sheets of newspaper and cover the areas all around the steering wheel, column, driver-side door, middle console, and driver seat/yourself. Make sure you use tape to seal the newspaper around the steering wheel itself to prevent over spray from getting through!
6. Following the directions on the can of spray paint, spray the emblem with an even coat approximately 10-16 inches away from the surface. Don't over coat it in one spray! Do quick but even coats, up to 2-3 times for the first round.
7. Using your Q-tips, very carefully touch up the paint immediately after the paint has stopped dripping. This takes a delicate touch, but soak up/spread the paint that accumulates along the top ridges of the emblem--particularly at the bottom. Be careful not to smudge the paint itself though, just very lightly smooth out the drips.
8. After one hour, re-coat the emblem with 1-2 more sprays, using the same Q-tip touch-up procedure immediately afterwards.
9. After 1-2 more hours, following the directions on the can of glaze, spray the emblem with an even layer of the clear coat. Only 1-2 coats are necessary. If you do a second coat, spray immediately after the first coat. And again use the Q-tip touch up as necessary--but VERY carefully. The glaze is a bit sticky and easy to smudge.
10. Allow everything to dry for 24 hours, carefully remove the tape, touch up as necessary with a razor, and voila! You're done. Per the instructions for the paint and clear coat, however, do not touch or handle the emblem for another 7 days following!
Pictures.....

^^ I didn't end up using the low grit sandpaper (on top), only the high grit 80 (green).
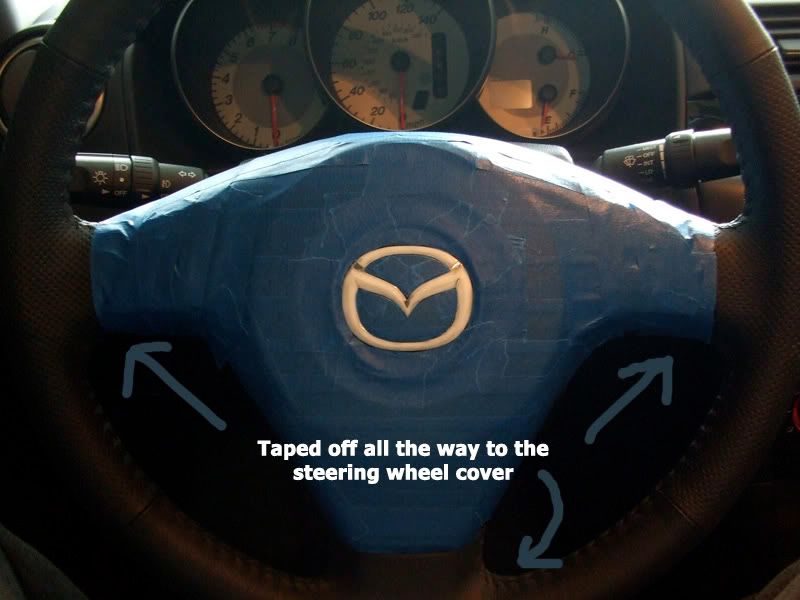
^^ I sanded after I taped, resulting in me having to re-do the tape all around the emblem.
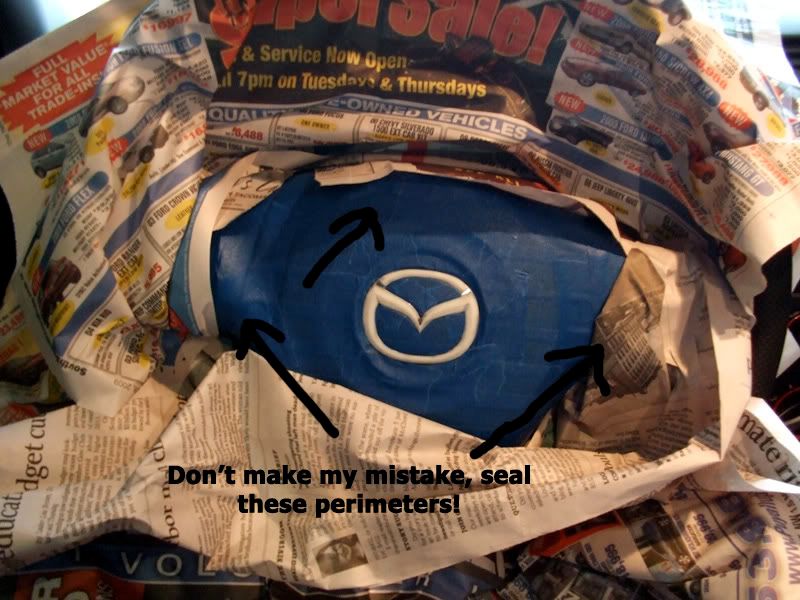
^^ I didn't seal the newspaper, which I learned later was a mistake (over spray).
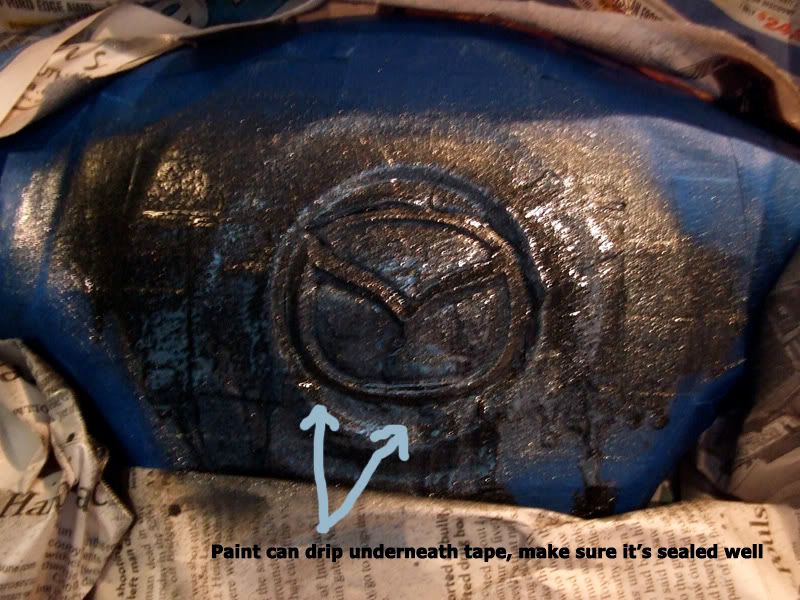
^^ During the painting process, I believe this was taken after my first round of coats.
^^ After all paint and glaze coats were finished, this is the dried product 24 hours later.
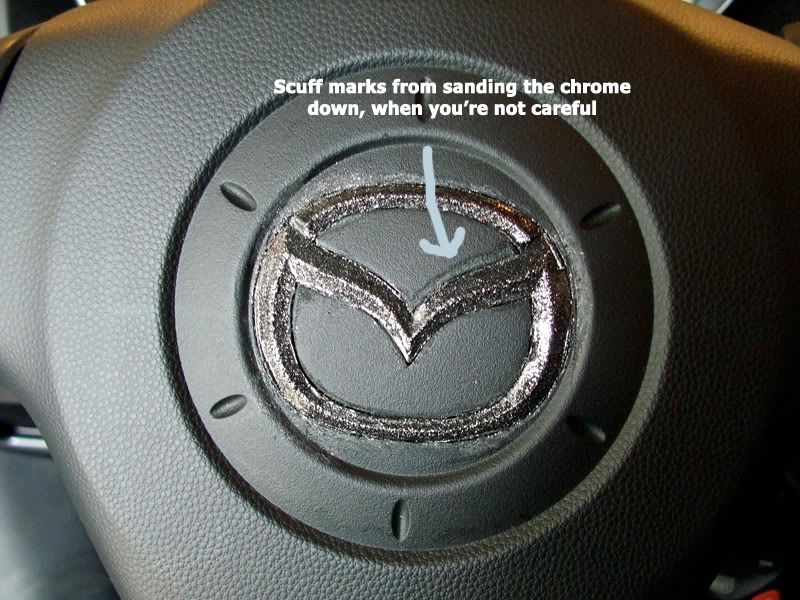
^^ Taken after I scraped off some of the excess around the emblem using a razor and my fingernail, being careful not to touch the emblem itself too much.

^^ It's still a little rough around the edges, but a little better
. And you can see my over spray.Overall, I'm happy with it. Total cost: About $10-20. It's not perfect, and if I had a chance to do it again I'm sure I could do it a lot cleaner. But it's also not a disaster, and I can definitely live with it. Beats the chrome for sure! As far as the over spray goes, thanks to my methods of taping everything off around the center portion, it only got on the steering wheel cover--which is replaceable if it ever bugs me too much.
The biggest points I can't stress enough are to make sure the tape is well sealed and stuck around the emblem, and tape off the newspaper around the steering wheel before painting. And be very careful with your Q-tips! I ended up having to do 1-2 more coats than I wanted to because I smudged the paint during my touching up.
Hope somebody can use this and hopefully improve on my work.


